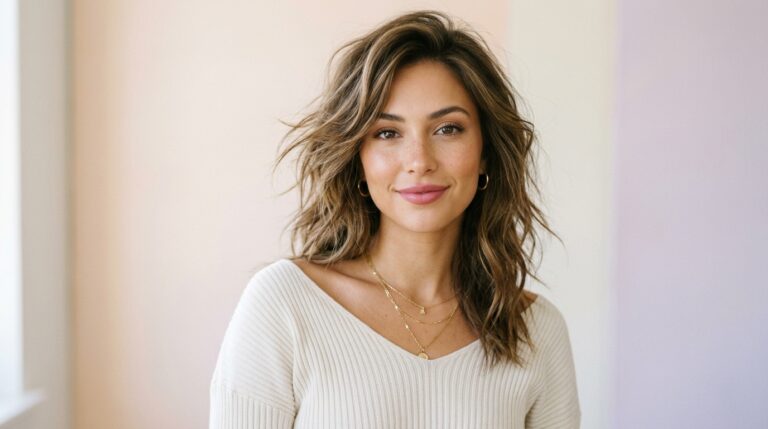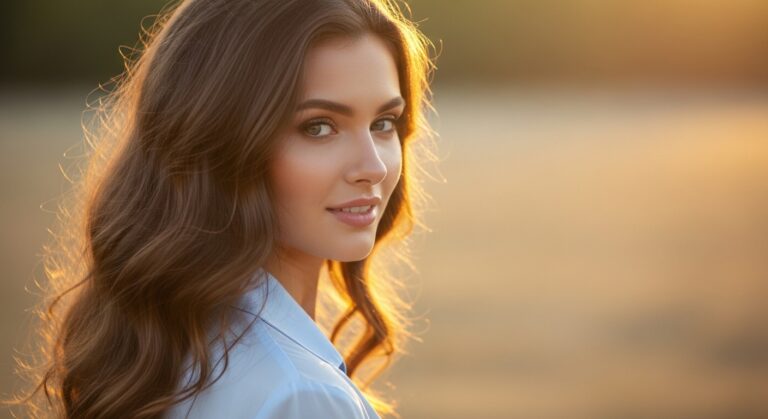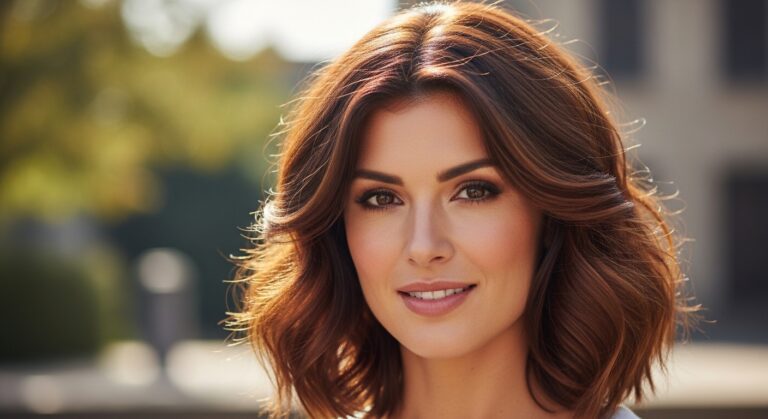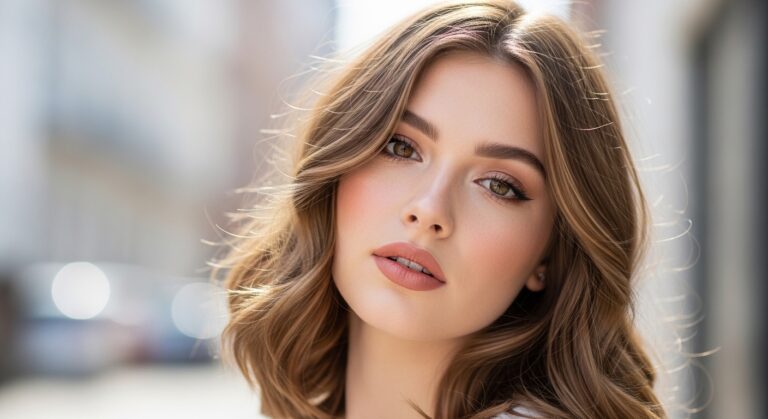
17 Butterfly Haircuts for Long Hair That Make Thin Hair Look Fuller
If your long hair has been feeling flat, limp, or just plain lifeless, the butterfly haircut might be exactly what changes everything. This cut works by adding strategic layers that frame the face and create the illusion of thickness — without sacrificing length. It gets its name from the way the layers fan outward from the center part, mimicking the shape of butterfly wings. It suits almost every hair type, but it does something especially magical for thin hair: it builds shape, removes bulk from the ends (where fine hair tends to look stringy), and adds movement that makes every strand count. Whether you’re into sleek blowouts or effortless air-dried waves, the butterfly cut adapts to your styling habits. This guide walks you through 17 real, wearable variations of the butterfly haircut for long hair — with honest styling tips, budget-friendly ideas, and honest guidance for what works at every hair length, texture, and lifestyle.
1. Classic Center-Parted Butterfly Cut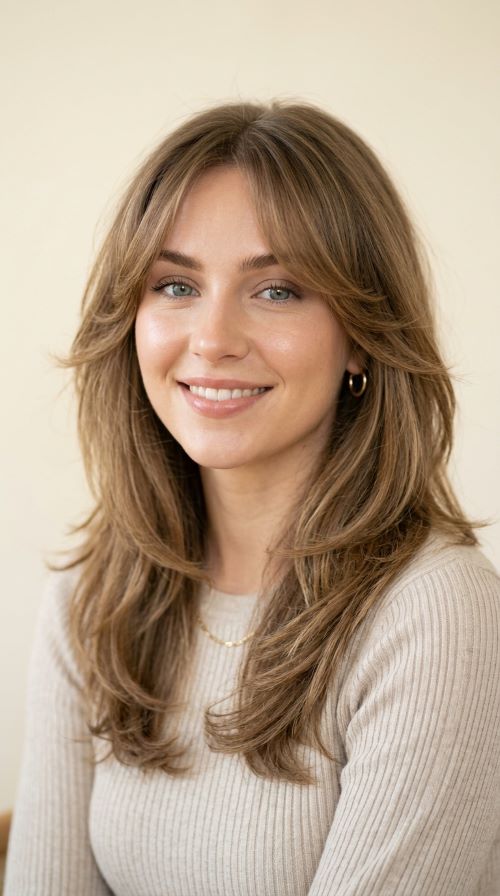
The classic center-parted butterfly cut is the foundation version — the one your stylist probably pictures when you say the words “butterfly haircut.” The layers start at the cheekbone or jaw and gradually blend into the rest of the hair as they fall toward the back. What makes it work for thin hair specifically is the way those shorter front layers lift away from the face. Instead of all your hair hanging at one uniform length (which makes fine hair look flat and sparse), the layers create different levels of movement. Ask your stylist for face-framing layers starting at the jaw, blending into the rest of your length. At home, use a round brush while blow-drying the top sections to lift roots and add body. You don’t need expensive products — a drugstore volumizing mousse applied to damp roots before drying works well. Part your hair exactly down the center, let those front layers fall forward, and you’ll see the butterfly shape take form. This style works on pin-straight hair and natural waves equally well. If you’re new to the cut, bring a reference photo to the salon. This version is the cleanest starting point.
2. Butterfly Cut with Curtain Bangs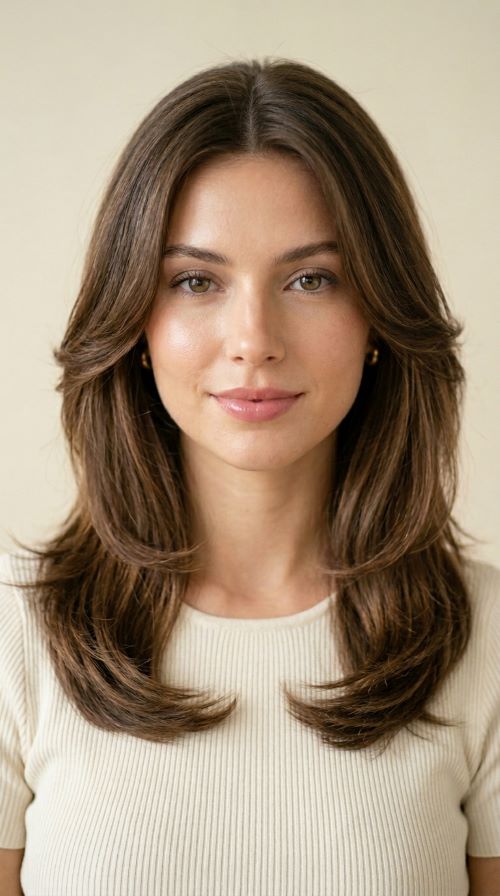
Curtain bangs and the butterfly cut are practically made for each other. When you add curtain bangs to the butterfly style, you create a seamless flow — the bangs act as the shortest layer of the whole look, gradually fanning outward into the longer face-framing layers. For thin hair, this is a real game changer because it puts visual volume exactly where you need it most: across the forehead and around the temples, which are often the sparsest areas. Curtain bangs can be cut DIY-style at home if you’re careful — section off the front triangle of hair, point-cut small snips at an angle rather than cutting straight across, and start longer than you think you need (you can always trim more). At the salon, this add-on usually costs very little extra. Style them by blowing the bangs slightly outward with a small round brush while they’re damp. A light-hold styling cream the size of a pea, worked through just the bang section, keeps them from going flat through the day. Avoid heavy serums on the bang section if your hair is fine — they’ll weigh the hair down and defeat the purpose.
3. Layered Butterfly Cut for Wavy Hair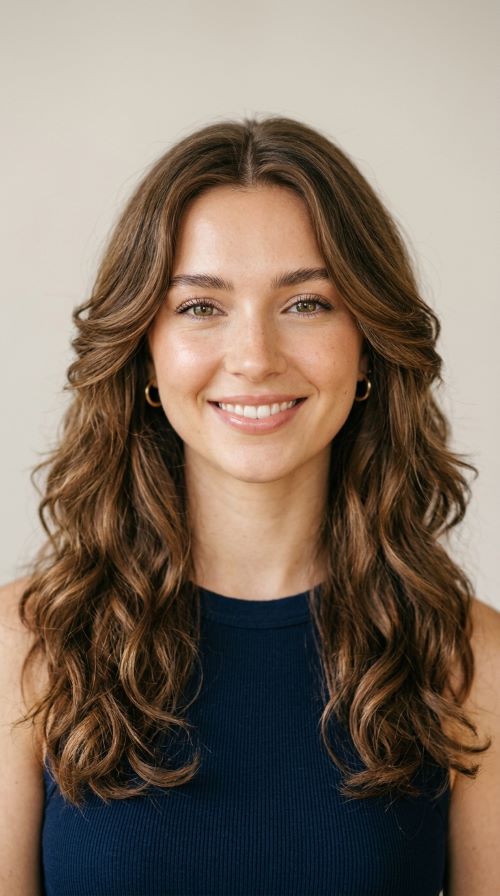
Wavy hair and butterfly layers are a natural match. Waves need room to move — when hair is cut at one length, the waves at the bottom bunch up and lose shape. The butterfly cut frees the layers to wave independently, which actually amplifies the wave pattern and makes the hair look much thicker. If your wavy hair has been looking flat and undefined, this is probably why. Tell your stylist you want long layers with a butterfly shape at the front, and ask them to point-cut the ends rather than blunt-cut them. Point-cutting means the scissors go into the hair vertically rather than horizontally, creating a softer edge that lets waves form naturally. At home, the styling routine is simple: apply a drugstore curl cream or mousse to soaking-wet hair, scrunch, and either diffuse or air-dry without touching. The butterfly layers will dry with beautiful separation, giving each section of your hair its own defined curve. Don’t brush wavy hair after it dries — use a wide-tooth comb only when wet. This version of the butterfly cut genuinely requires minimal effort once it’s cut correctly.
4. Butterfly Cut with Money Pieces
Money pieces are those two highlighted streaks that frame either side of the face, and when you pair them with a butterfly cut, the visual effect on thin hair is remarkable. The color contrast draws attention directly to the face-framing layers, making them look thicker and more defined than they actually are. This is a clever optical trick: the eye sees contrast and reads it as volume. You can get money pieces done at a salon for a modest price, or do a DIY version at home using a highlighting kit with a fine brush — you only need to apply color to the very front sections. Keep the money pieces between one and two inches wide for a natural look. Bleach-based highlights are the most visible, but if your hair is on the fragile side, a gentler semi-permanent color lift works too. Style these pieces by wrapping them around a 1-inch curling wand away from the face so they curve back and show off the color. This simple styling choice makes the layers look fuller and gives the haircut a more intentional, polished appearance without requiring a full color treatment.
5. Soft Butterfly Cut for Fine, Straight Hair
Fine, straight hair is arguably the hair type that benefits most from the butterfly cut — but it also requires the lightest hand. The goal here is to add just enough layering to create movement without removing so much weight that the hair goes limp or transparent at the ends. Ask your stylist for minimal layers with a light butterfly shape — you want the shortest face-framing pieces to hit around the collarbone, not the jaw. Keeping the layers longer maintains some weight while still giving the front sections lift. At home, the blow-dry technique matters more than any product here. Use a paddle brush on the lengths and a small round brush at the roots, lifting up and slightly forward as you dry. This builds root lift that lasts most of the day. A light texturizing spray applied to dry hair adds grip and makes the hair feel thicker between the fingers. Avoid heavy oils or serums — they flatten fine hair almost immediately. This version of the cut is low-maintenance, grows out gracefully, and doesn’t require frequent trims to stay looking intentional.
6. Butterfly Cut with Invisible Layers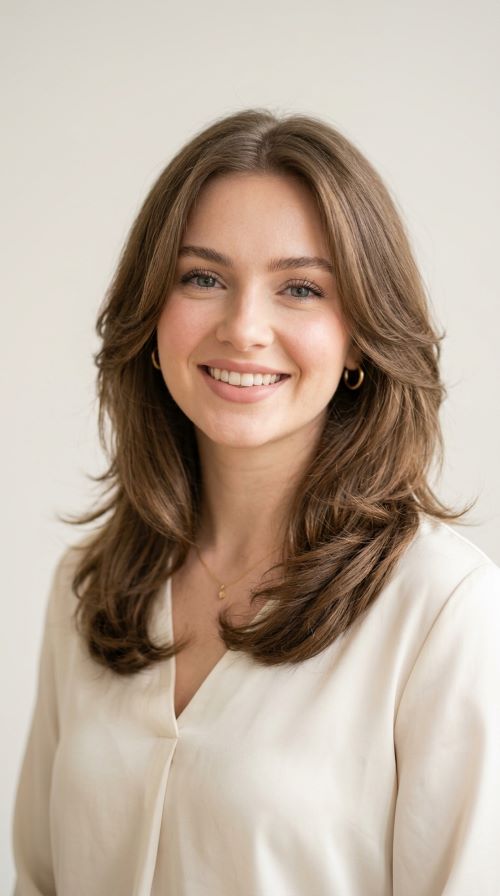
Not everyone wants visible, dramatic layers — and that’s where invisible layering comes in. This technique involves cutting layers only within the interior of the hair, leaving the outer surface smooth and one-length looking. The butterfly shape is still there in terms of structure, but from the outside, the hair looks sleek and uniform. For thin hair, this is ideal when you want volume without the choppy layer look. The internal layers remove bulk from the middle and lower sections, allowing the hair to move more freely and look less flat — all while maintaining a polished surface. Ask your stylist specifically for internal point-cut layers with a butterfly structure — this terminology helps them understand you want movement, not visible graduation. Styling is straightforward: blow-dry with a paddle brush, finish with a flat iron on low heat for smoothness, and apply a tiny amount of lightweight oil to the ends only. The hair will look full and healthy without showing where the layers begin or end. This version grows out extremely gracefully, making it great for someone who doesn’t want to commit to regular trims.
7. Butterfly Cut with Textured Ends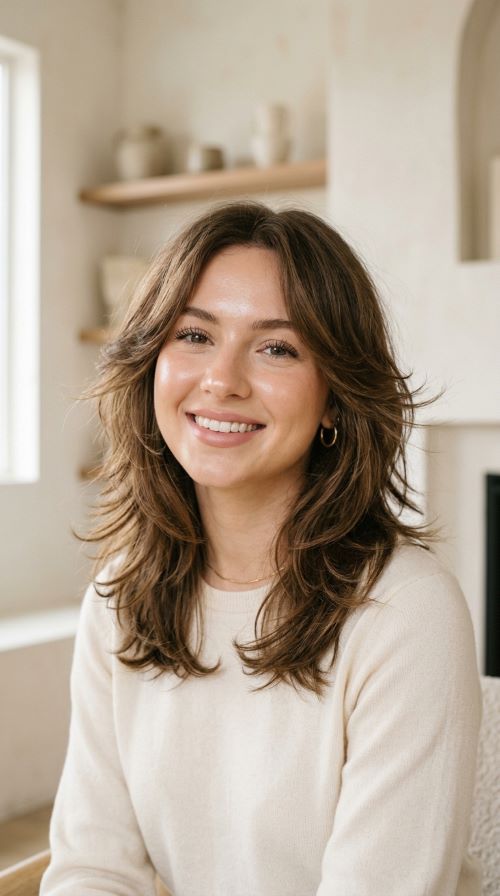
Blunt ends on thin hair are rarely a good idea — they emphasize how sparse the hair looks at the bottom and create a broom-like silhouette. Textured ends fix this completely. When you finish a butterfly cut with point-cut or razor-textured ends, each strand tapers slightly at the tip rather than ending at the same point. This softens the perimeter of the haircut and creates a wispy, natural finish that reads as fullness rather than thinness. The texture also allows waves and curls to form more naturally at the ends, which adds dimension. At home between salon visits, you can maintain textured ends by buying a pair of thinning shears (available for under $15 online) and very lightly point-cutting the very ends of your hair every six to eight weeks. Don’t overdo it — a few snips per section is enough. This is one of the most budget-friendly maintenance moves for thin hair. Pair this with a butterfly cut that has collarbone-length face layers and you get a haircut that looks professionally maintained and full even as it grows out.
8. Butterfly Cut for Shoulder-Length Long Hair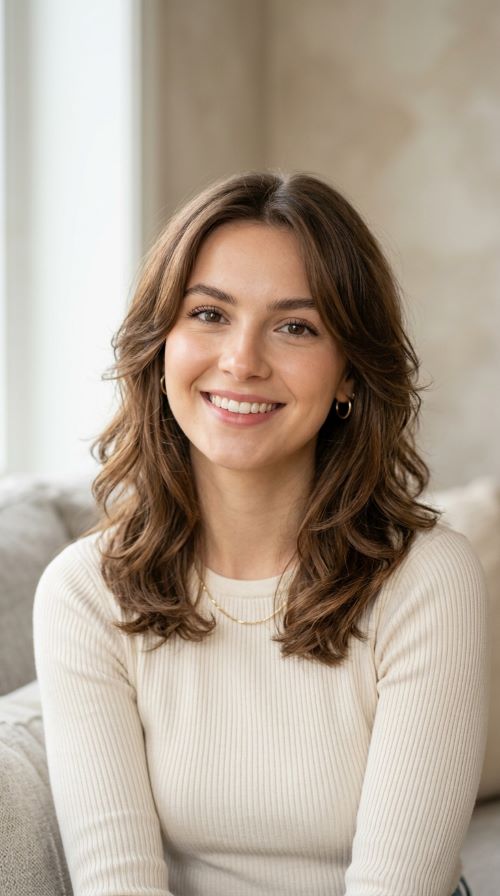
“Long hair” means different things to different people — and if yours sits just at or below the shoulders, the butterfly cut still works beautifully. In fact, this length is one of the most flattering for the cut because the face-framing layers don’t have far to travel before they blend into the rest. The layers sit at the jaw or cheekbone, the rest of the hair grazes the collarbone, and the result is a haircut that looks intentional and full without needing length you don’t have. At shoulder length, fine hair can look especially flat because there isn’t enough length to create natural movement. The butterfly structure solves this by giving different sections permission to move in different directions. Style this length by scrunching with a small amount of sea salt spray on damp hair and air-drying — the layers will dry with natural separation and a beachy texture. If you prefer a smoother look, blow-dry with a round brush at the crown for lift and a paddle brush on the lengths for smoothness. This length is also the easiest to maintain at home between trims.
9. Butterfly Cut with a Deep Side Part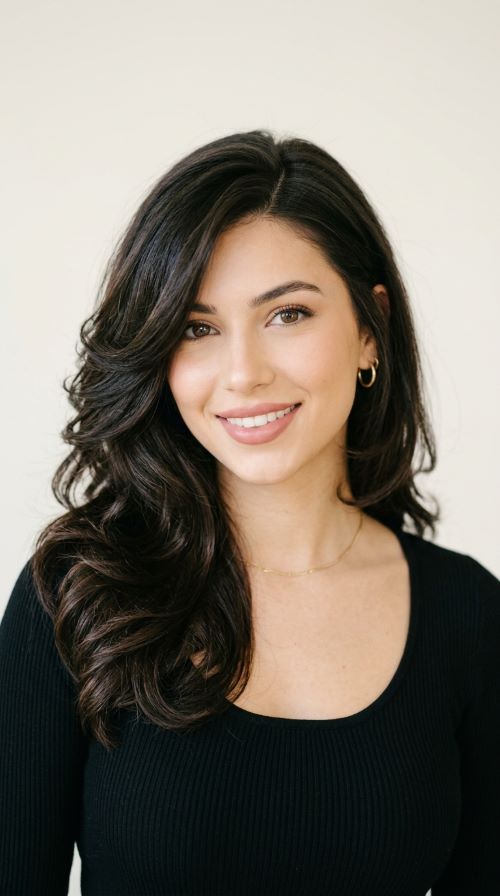
The center part is the classic pairing for the butterfly cut — but a deep side part unlocks a completely different kind of volume. When you sweep most of the hair to one side, the butterfly layers on the heavier side stack on top of each other, creating a thick, full-looking wave of hair. For thin hair, this is a styling trick worth using regularly. The side part also creates height at the crown on the lighter side, which opens up the face and adds the illusion of density at the roots. To get the most out of this style, blow-dry your roots in the opposite direction of your final part first, then flip the part back into place — this creates lift that lasts longer than if you just dry in the direction you want. Finish with a lightweight flexible hairspray just at the roots to hold the lift. You don’t need to re-cut anything for this look — it’s purely a styling variation of your existing butterfly cut. Try it on days when your hair isn’t cooperating with a center part or when you want a slightly more polished appearance.
10. Butterfly Cut Styled with Loose Waves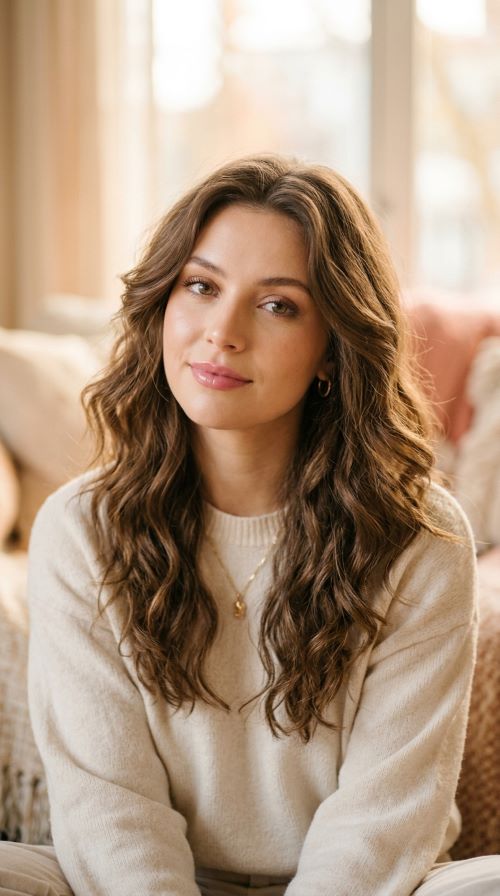
Loose waves are the most flattering way to style a butterfly cut on thin hair — full stop. When you add even soft, imperfect waves to the layers, the hair gains three to four times the visual volume it has when worn straight. The layers twist and lift in different directions, and the result looks far thicker than the actual hair density. To achieve this at home without spending money at a salon, use a 1.5-inch curling wand (these can be found at drugstores for under $20). Wrap sections away from the face — this frames the features and keeps the look open. Don’t clamp or hold too long, and don’t try to make them perfect. After curling all sections, flip your head upside down and shake gently with your fingers, then flip back up and don’t touch them. The butterfly layers will separate naturally into soft, lived-in waves. A small amount of texturizing spray or dry shampoo at the roots before curling adds grip and helps the style last. This is the go-to everyday styling option for thin hair with a butterfly cut.
11. Butterfly Cut on Dark Hair with Highlights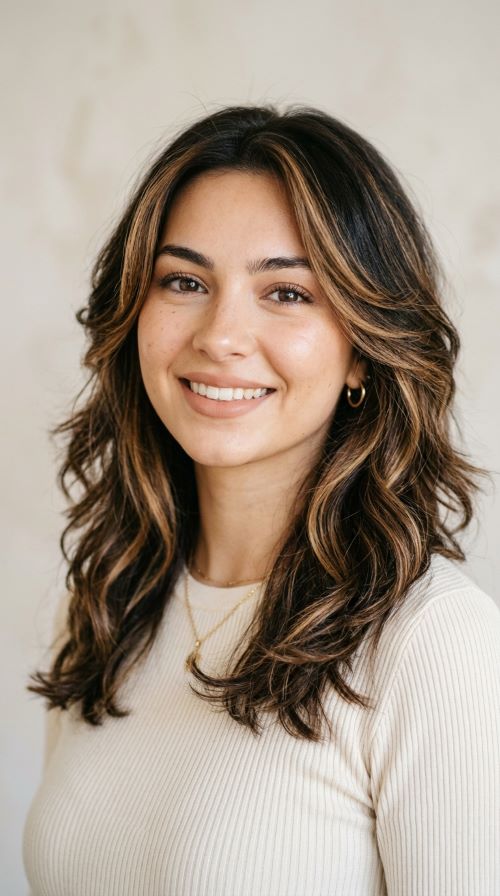
Dark hair is stunning, but it can sometimes absorb light rather than reflect it — making hair appear flatter and less full than it is. Scattered highlights throughout a butterfly cut change this completely. Highlights break up the surface of the hair by creating contrast between strands, and your eye reads that contrast as thickness. You don’t need full highlights — a partial highlight or even a few hand-painted pieces through the mid-lengths and ends is enough to make the layers look more defined. At home, you can achieve a subtle version of this with a DIY highlight kit designed for use at home. Apply the color to random sections through the mid-length and ends — not the roots — for a natural-looking result. Balayage-style kits let you paint sections freehand and are forgiving for beginners. Once the highlights are in and the butterfly cut is styled, every layer catches light differently, which is exactly what makes the hair appear full. This combination is one of the most effective strategies for thin dark hair.
12. Butterfly Cut for Very Long Hair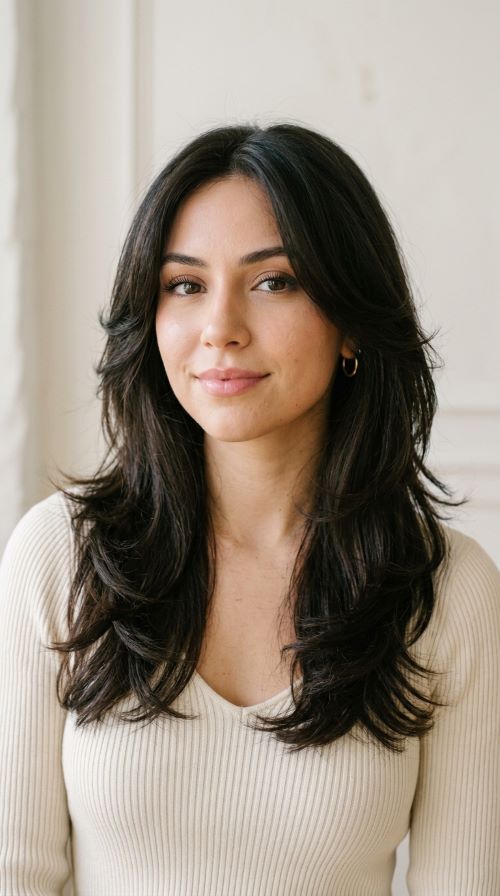
Very long hair — below the bra strap — can feel heavy, especially when it’s fine. All that weight pulls the hair flat against the scalp and stretches out any natural wave or body. A butterfly cut on very long hair doesn’t mean cutting the length — it means adding strategic face-framing layers that start high (at the jaw or cheekbone) and blend into the rest of the length gradually. This lifts the upper sections away from the face while the rest of the hair keeps its length. The key for very long thin hair is to avoid heavy layering through the mid-lengths — removing too much weight there can make the ends look sparse. Ask for layers concentrated at the front and top, with the rest of the cut left relatively one-length. At home, use a volumizing shampoo and conditioner (apply conditioner only from the mid-length down, never at the roots) to avoid weighing down roots. Blow-dry the roots upward first before styling. Very long hair with a butterfly cut looks especially beautiful worn in a half-up style, which shows off the face-framing layers while keeping the length visible.
13. Butterfly Cut with Wispy Face-Framing Pieces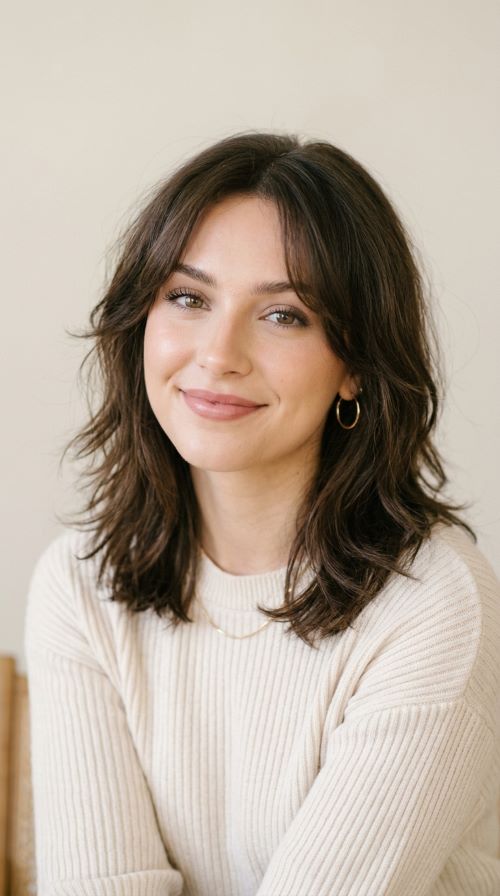
Wispy face-framing pieces are the softest version of the butterfly layer. Instead of a blunt layer at the jaw, these pieces are thinned out and tapered so they almost float alongside the face rather than sitting heavily. For thin hair, wispy pieces are better than thick blunt layers because they don’t reveal how sparse the hair actually is — a thick face-framing layer on thin hair can look separated and obvious. Wispy layers blend more naturally and still frame the face beautifully. Ask your stylist for razored or point-cut face-framing pieces that are thinned through rather than left solid. At home, you can create this effect with a pair of thinning shears — press them into the center of each face layer rather than cutting across the length, which thins and softens without removing length. Style these pieces by wrapping them around a small curling iron away from the face and letting them fall loose. A tiny amount of light-hold gel on just these pieces helps them hold the curl and stay separated throughout the day without looking crunchy.
14. Butterfly Cut with Beach Waves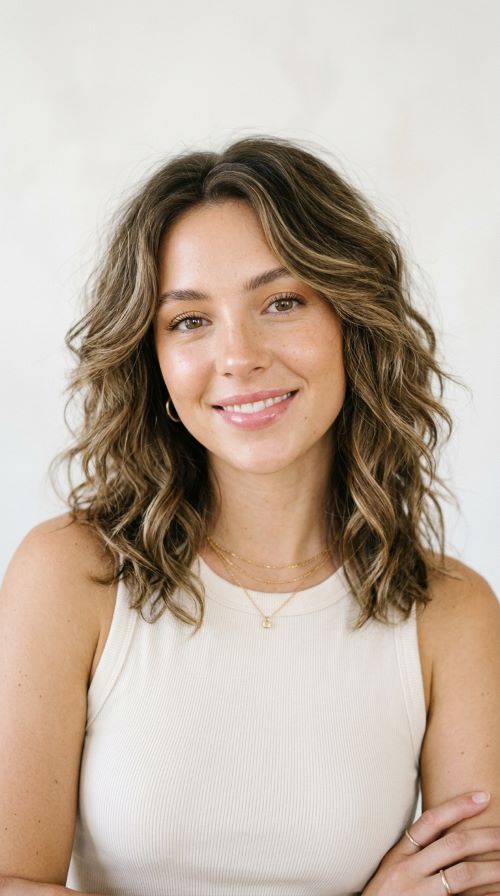
Beach waves are relaxed, undone, and full-looking — and they’re one of the easiest everyday styles for a butterfly cut. The layers in the butterfly cut make beach waves look particularly full because each layer curls at a slightly different angle, creating layered texture that adds visual depth. The best part about beach wave styling is that it rewards imperfection — you don’t need clean, uniform curls. At home, spritz damp hair generously with sea salt spray (a basic DIY version is just water, a pinch of sea salt, and a few drops of coconut oil in a spray bottle), scrunch, and either air-dry or diffuse on low heat. For extra texture, braid damp hair into two loose braids, sleep on it, and undo the braids in the morning — no heat required, zero cost, and you wake up to full-looking waves that show off every layer of the butterfly cut. Add a tiny amount of dry shampoo at the roots for extra lift. This is one of the most genuinely effortless ways to wear a butterfly haircut.
15. Butterfly Cut on Color-Treated Hair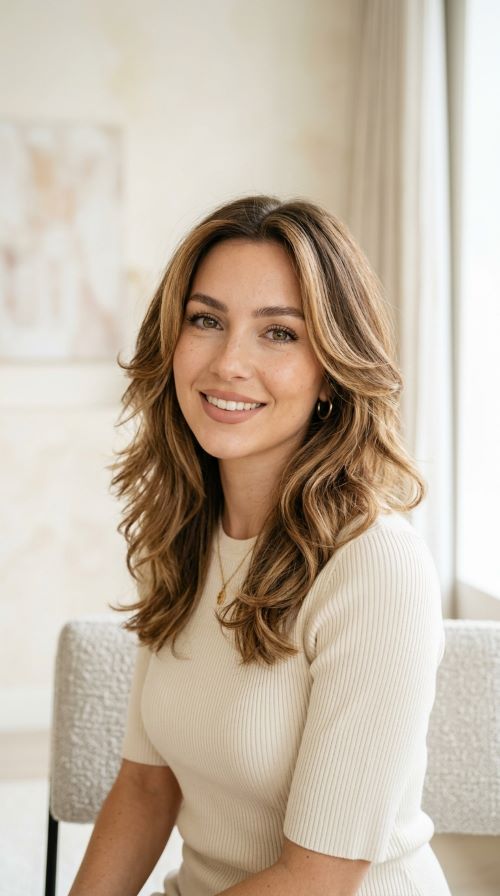
Color-treated hair — whether it’s balayage, highlights, or a full color — interacts beautifully with the butterfly cut because the color variation between layers creates natural-looking dimension. When your hair is all one color and thin, it can look uniform and flat. Color breaks up that surface and gives the eye something to follow through the layers. The butterfly cut maximizes this effect by positioning the most visible layers at the front, where the color contrast is most noticeable. If your hair is currently color-treated, maintaining it costs less when it’s layered — balayage and money pieces grow out gracefully without hard lines that need frequent touch-ups. A good balayage can last four to six months without looking grown-out. Between color appointments, use a color-depositing conditioner (these are available at drugstores for under $10) once a week to keep the tones vibrant and the hair looking intentional. For the cut itself, make sure your stylist knows your hair is color-treated — chemically processed hair can behave differently when cut, especially if layers are too aggressively thinned.
16. Butterfly Cut Styled Straight and Sleek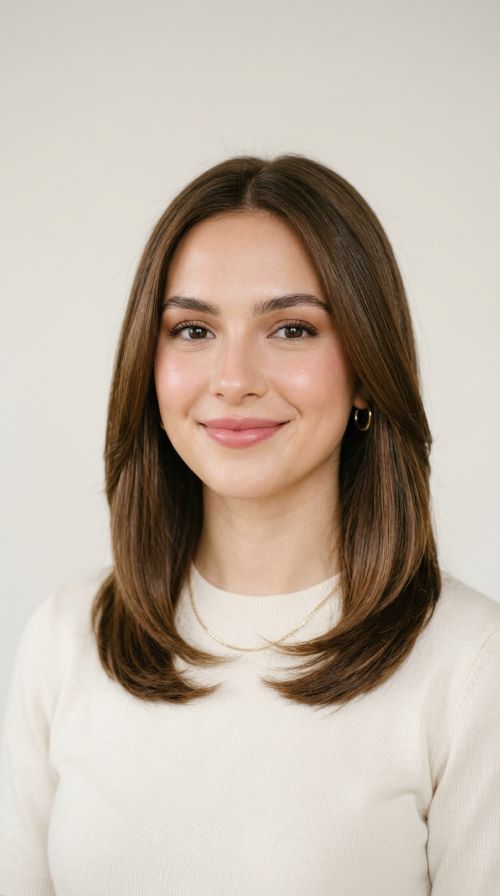
The butterfly cut doesn’t have to look wavy or textured — styled straight and sleek, it gives the illusion of a sharp, intentional cut that thin hair rarely looks like on its own. When blow-dried smooth, the layers at the front become crisp and defined, creating clean lines that frame the face like a professional color-coded illustration. The trick for thin hair here is to not flatten the roots entirely — keep some lift at the crown by blowing roots upward before smoothing them down, and the sleek style will still have shape. A flat iron on low-to-medium heat (around 350°F) can be used to smooth the lengths after blow-drying, but avoid over-ironing the same sections. Finish with a very small amount of lightweight serum — less than a dime-size amount — on the lengths only. Too much product on fine hair makes it look greasy within hours. This sleek version of the butterfly cut works especially well for professional settings or occasions where you want your hair to look polished and put-together rather than casual.
17. Butterfly Cut Worn in a Half-Up Style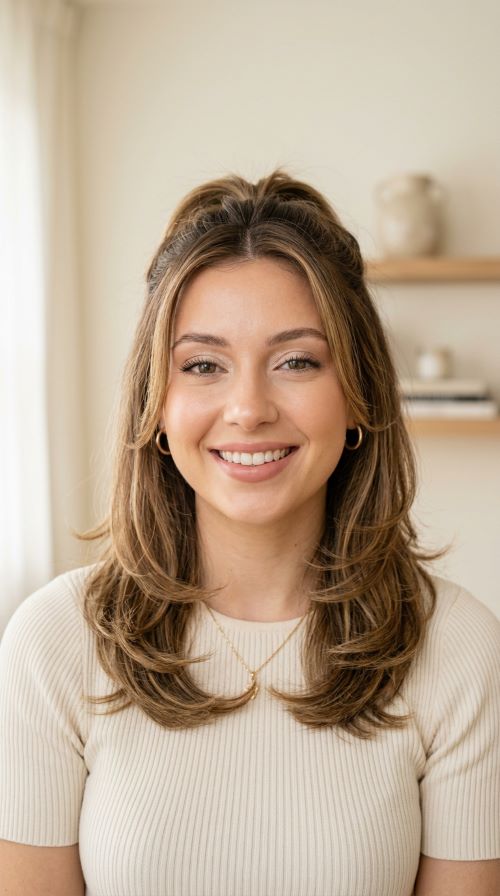
The half-up style is the best way to show off a butterfly cut while keeping things easy. Pulling the top section up — even loosely, with a simple clip or hair tie — reveals the face-framing layers in full and instantly lifts the crown, which is where thin hair tends to look flattest. The bottom half hangs loose, showing off the length and any texture or wave you’ve got going on. This style takes about 30 seconds to execute and requires no tools. For thin hair, the key is to make the top section slightly messy rather than slicked back pull a few pieces loose at the temples, let the part be imperfect, and keep the clip low rather than tight at the crown. A tight, high clip compresses thin hair and makes it look sparse. A loose, low, relaxed version creates volume. Between wash days, dry shampoo at the roots before pulling up the top section adds texture and grip, making the style last longer without slipping. This is the go-to option for second-day hair on a butterfly cut — quick, flattering, and always looks like you tried more than you actually did.
Conclusion
The butterfly haircut for long hair is one of the most practical things you can do for thin hair that refuses to look full. It works not by adding more hair, but by rearranging the hair you have — placing layers where they create movement, frame your face, and trick the eye into reading volume. Whether you go for curtain bangs, money pieces, wispy layers, or a clean sleek blowout, every variation here builds on the same idea: smart structure, not more product. Most of these styles can be achieved or maintained without spending a lot of money. Many of the styling tips — sea salt spray DIY, thinning shears for home use, braiding overnight for waves — cost almost nothing. The cut itself is what does the heavy lifting. Find a stylist who understands fine hair, bring a reference photo, ask for light and strategic layers rather than heavy graduation, and you’ll leave with a haircut that genuinely changes how your hair behaves every single day. Start with the variation that matches your current length and lifestyle, and build from there.
![[Image Prompt: A high-end photograph of an older woman with a chin-length bob haircut, smooth texture, and a natural shine, sitting indoors with soft window lighting. The haircut frames her jawline neatly, and her expression is calm and confident. No text or words in the image.]](https://hairglowz.com/wp-content/uploads/2026/05/Woman_with_long_flowing_hair_202605021410-768x429.jpeg)