How to Do a Reverse Braid for a Stunning New Look
Want a braid that actually stands out? A reverse braid also known as an inside-out braid is your secret weapon. Instead of blending into your hair, it pops beautifully on top, creating volume, texture, and that eye-catching wow factor.
Whether you’re heading to brunch, a wedding, or just want to upgrade your everyday look, this braid delivers instant glam with surprisingly simple steps.
Let’s break it down so you can master it confidently
What Is a Reverse Braid?
A reverse braid (often called a Dutch braid) is similar to a classic three-strand braid—but with one key difference.
Instead of crossing sections over the middle strand, you cross them under.
That small change creates a braid that sits on top of your hair rather than blending in. The result is a bold, raised braid that looks fuller and more dramatic.
It works beautifully for everyday casual looks, gym hairstyles, formal events, half-up styles, and even double braids. Once you learn the underhand motion, you’ll never forget it.
What You’ll Need Before You Start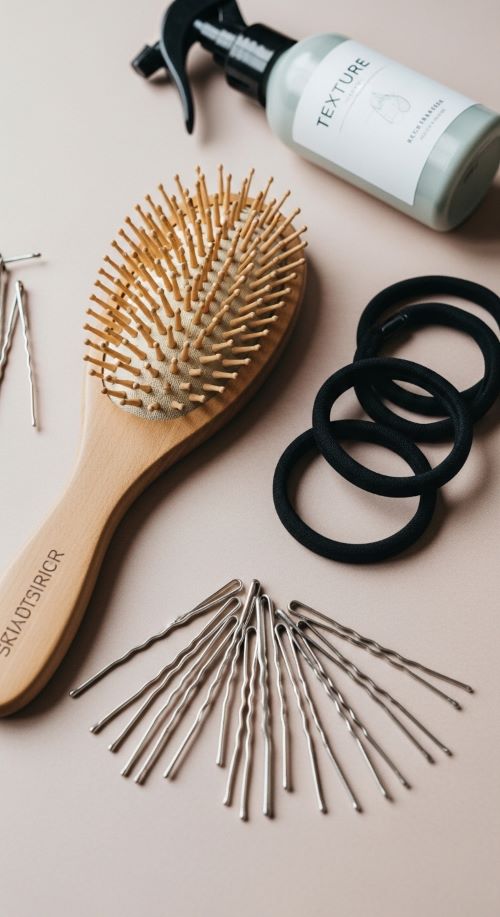
Good news: You don’t need fancy tools.
A simple brush or detangling comb will help smooth your hair. Keep one or two hair elastics nearby to secure the braid. Texture spray can add grip if your hair is very silky, and bobby pins are helpful for adjusting small sections. A light mist of hairspray at the end can lock everything in place.
Now let’s get into the fun part.
Step-by-Step: How to Do a Reverse Braid
Step 1: Prep Your Hair
Start with brushed, tangle-free hair. You can braid dry hair or slightly damp hair depending on your preference.
Decide where you want your braid positioned. Beginners usually find it easiest to start at the crown in the center of the head. Make sure your parting is neat and your hair feels smooth before moving on.
Step 2: Section Your Hair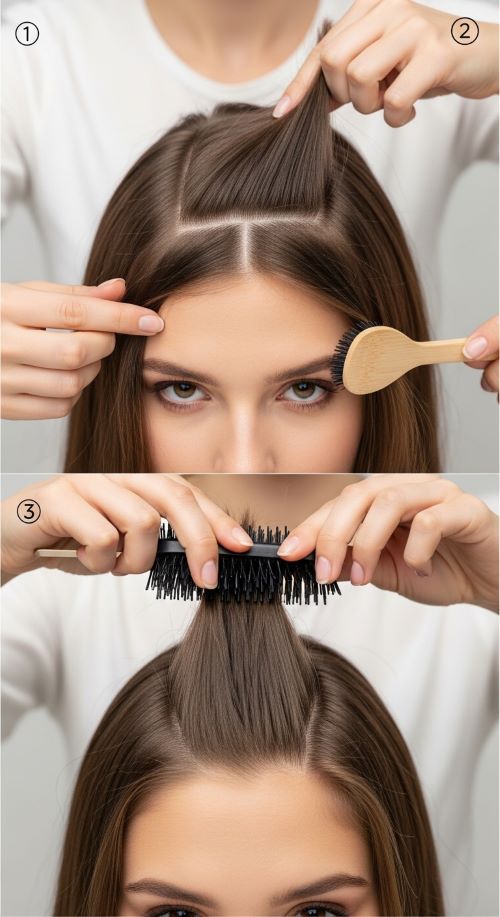
Take a section from the top front of your head, about two to three inches wide. Divide it into three equal strands.
Hold the left strand in your left hand, the right strand in your right hand, and keep the middle strand in between. This is your starting base.
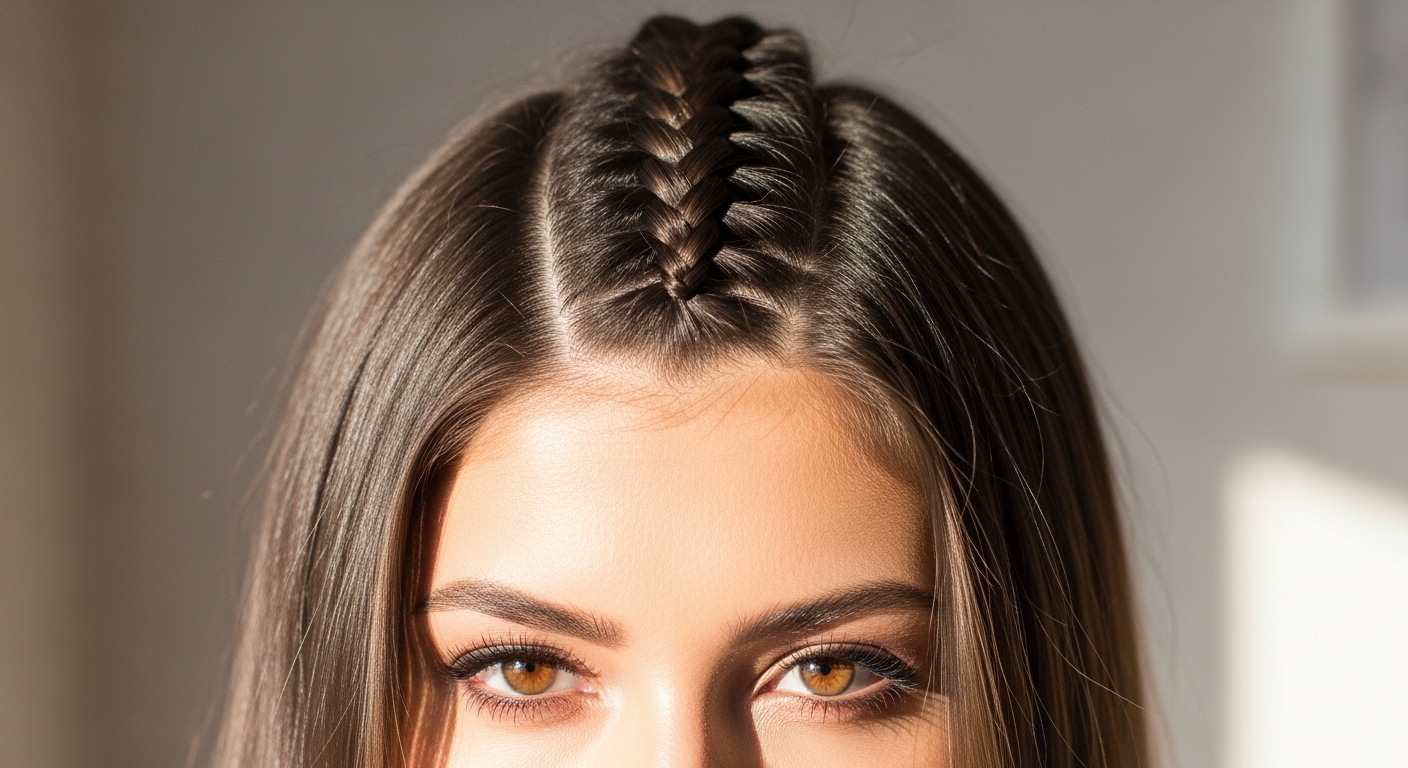
Step 3: Cross Under (Not Over!)
This is the most important part of a reverse braid.
Take the right strand and cross it under the middle strand. Then take the left strand and cross it under the middle strand. You have now formed the beginning of your reverse braid.
Remember, every movement goes underneath. If you accidentally cross over, you’ll create a traditional braid instead.
Step 4: Add Hair as You Go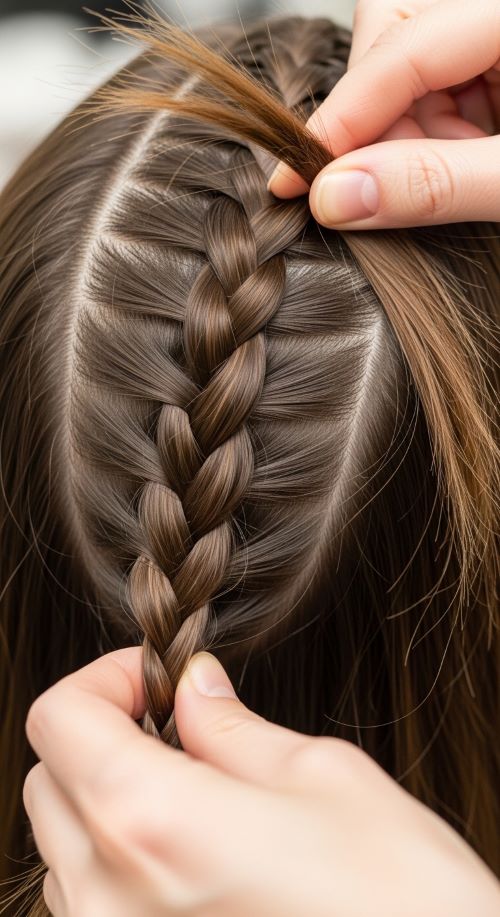
Now it’s time to build the braid along your scalp.
Before crossing a side strand under the middle, gather a small section of loose hair from that same side. Combine it with the strand, then cross it under the middle. Repeat the same process on the opposite side.
Continue this pattern as you move downward. Add hair, then cross under. Add hair again, then cross under. Work slowly to keep the sections even and neat.
Take your time here. The neater the sections, the cleaner the braid will look.
Step 5: Finish the Braid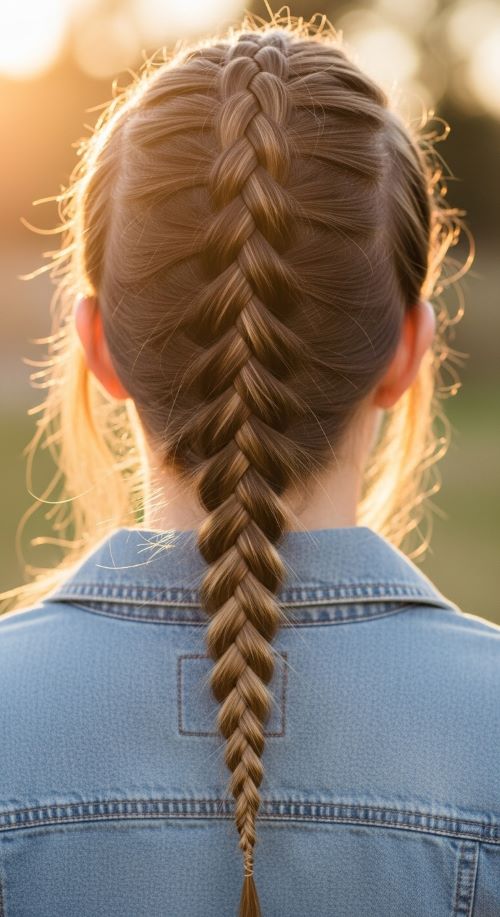
Once you reach the nape of your neck and there’s no more loose hair to add, continue braiding normally while still crossing the strands under each other.
When you reach the ends, secure the braid with a hair elastic. To create a fuller look, gently tug the outer edges of the braid. This technique, often called pancaking, adds softness and volume.
Tips to Make Your Reverse Braid Look Amazing
After securing your braid, gently pull small sections outward to make it appear thicker and more relaxed. If you’re braiding your own hair, using two mirrors can help keep everything centered and even.
If the motion feels awkward at first, practice crossing strands under without adding hair. This builds muscle memory quickly. Braids also tend to hold better on second-day hair or hair with a bit of texture, so don’t worry if it feels easier the day after washing.
Fun Variations to Try
Once you feel comfortable with the basic technique, you can experiment with placement and styling.
You might try double reverse braids for a sporty vibe, a half-up reverse braid for a soft romantic feel, or a side reverse braid for something more relaxed and flattering. You can even twist the finished braid into a bun for a more formal look.
Each variation uses the same under-cross technique. The only difference is where you start and how you finish.
Common Mistakes to Avoid
One of the most common mistakes is crossing strands over instead of under, which changes the entire look. Uneven hair sections can also make the braid appear lumpy. Pulling too tightly at the scalp may cause discomfort and reduce volume, while skipping detangling can lead to messy strands and frustration.
If your first attempt isn’t perfect, don’t worry. Braiding improves quickly with practice.
Final Words
A reverse braid looks intricate and polished, but once you understand the simple rule of crossing under, it becomes surprisingly easy.
Practice a few times, experiment with volume, and soon you’ll have a go-to hairstyle that instantly upgrades your look.
Ready to give it a try? Grab your brush, stand in front of the mirror, and start crossing under.
And don’t forget to save this guide for later—you’ll be glad you did